

How to output sound to a TV via HDMI: connecting a cable and setting up an audio signal
 It has been almost twenty years since the HDMI standard has firmly established itself as the main method of wired communication between various devices. It appeared in 2003 and has been constantly developing since then.
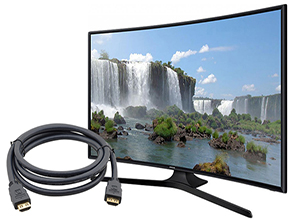
HDMI (High Definition Multimedia Interface) can be translated into our language as “high definition multimedia interface”. It allows you to transmit audio and video signals of the highest quality with virtually no delay.
And besides, although this is not its main advantage, HDMI will allow you to control the volume of the connected device using the TV remote control.
Through this interface, you can connect any gadget that allows you to output image and sound to the TV, as well as several types of audio devices at once, such as AV receivers, stereo amplifiers, soundbars and active speakers.
In this article, we will take a closer look at the methods of wired connection to a TV via HDMI and tell you about the advantages of such a connection.
Content
How to output sound to TV via HDMI
When discussing the HDMI interface, it would be a sin not to mention ARC (from the 1.4 standard) and eARC (from the 2.1 standard). These abbreviations, respectively, come from the English names Audio Return Channel and a more modernized version of Audio Return Channel. In our language, this literally means "Audio Return Channel" and "Enhanced Audio Return Channel".
Every modern TV has this input, often referred to as HDMI (ARC), at least the 2.0 standard has that designation.
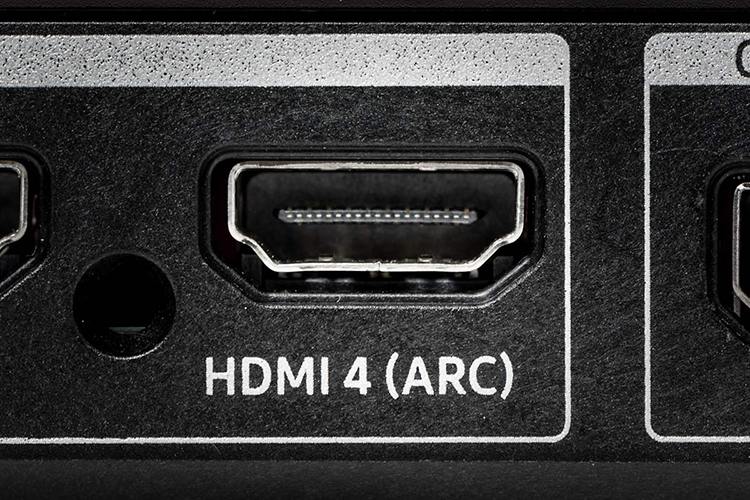
What exactly is it for? The fact is that it is this connector that will allow us not only to receive an audio / video signal from the receiver, but also to send sound from the TV back to the connected equipment.
At the moment, only through this interface we are able to receive uncompressed multi-channel audio, such as Dolby TrueHD or DTS-HD Master Audio. For example, from Blu-ray players.
And newer versions of the eARC connector can already carry surround sound in 7.1-channel format, such as DTS: X or Dolby Atmos. For ordinary users, this may not be the most important feature, but for a real music lover or movie fan, it is practically a must.
This solution will also allow you to broadcast multimedia presentations on a large screen, so it is often used by teachers, educators, students and instructors.
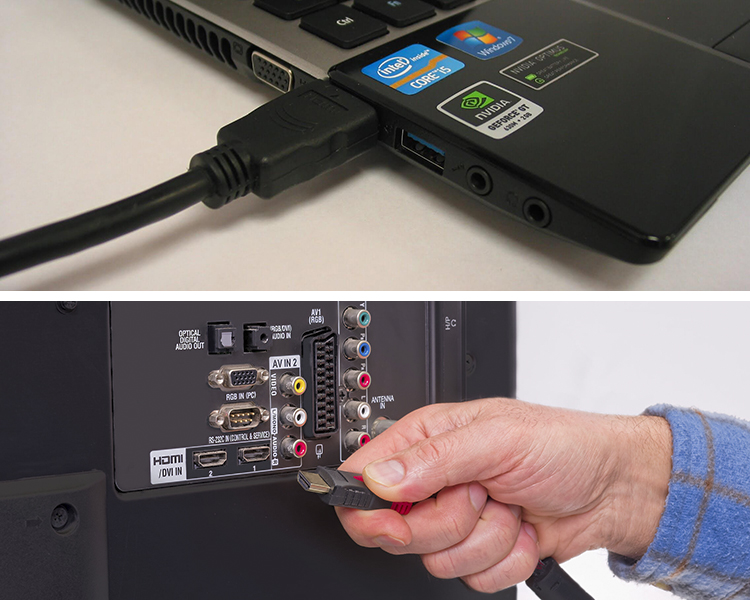
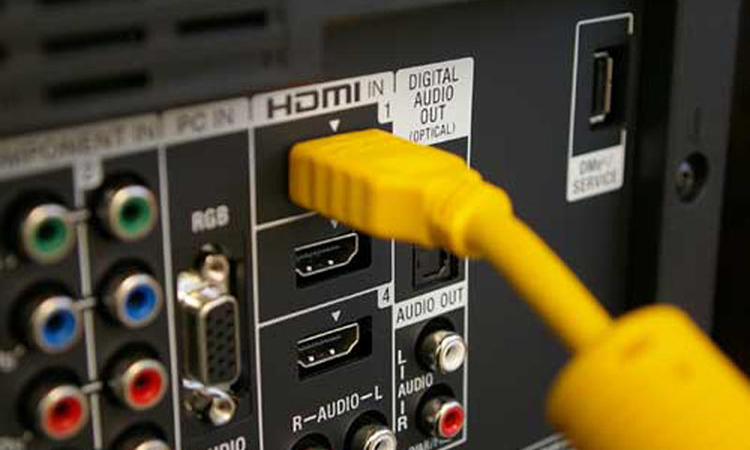
Most laptops and TVs have a standard size HDMI port.
In this case, connecting two devices to each other is very simple:
- Turn on your laptop and TV.
- Use the remote control to set the HDMI port as the input source on the TV. If it is equipped with multiple HDMI connectors, then check the port number to which you are going to connect the cable.
- Plug one end of the HDMI cable into your TV and the other end into your laptop.
- After the correct connection, the image from the laptop monitor should automatically display on the TV screen.
Connecting a TV to a computer through an adapter
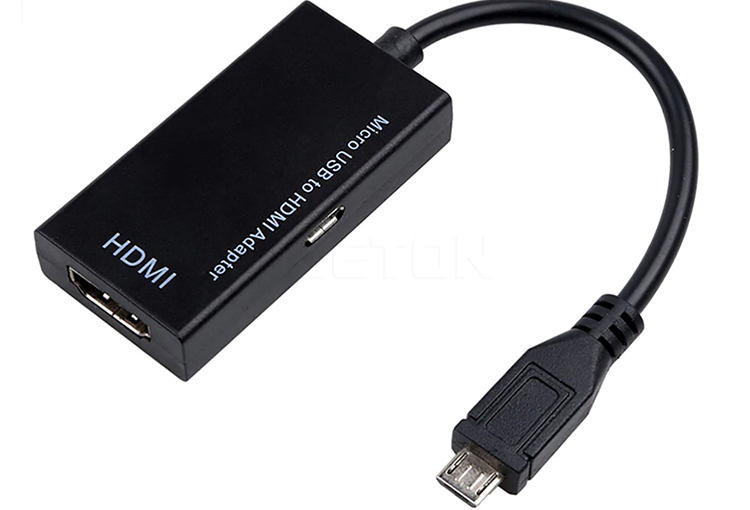
Some laptops, especially smaller ones, have a smaller slot, such as a micro or mini HDMI port, instead of a standard size HDMI port. In this case, it will be easiest to buy a cable with two different ends. Then the connection method is the same as for the HDMI to HDMI cable.
Another option is to use an adapter. This is a two piece item, a mini/micro HDMI cable and a standard HDMI connector.
The following instruction explains step by step how to connect a laptop to a TV using an adapter:
- Turn on your laptop and TV.
- Set the HDMI port as a signal source using the remote control.
- Plug one end of the HDMI cable into your TV and the other end into the adapter.
- Plug the adapter plug into your laptop's non-standard HDMI input.
- The image should automatically appear on the TV screen.
How to set the sound output to the TV after connection
Modern televisions are so advanced that some sources, such as satellite television, may no longer keep up with the quality of the video signal.
But whether you choose a soundbar, a home theater receiver, or other possible audio devices, you need to connect your sound system to your TV somehow.
In the era of digitization, analog outputs have almost disappeared, completely replaced by digital ones, so this will not be a big problem.
Setting the audio output on a TV connected via HDMI to a computer
It's not uncommon for Windows 10 PCs to experience audio issues with the HDMI port.
By default, the audio output is set to send a signal to your computer's speakers.And sometimes it happens that when you connect an HDMI cable between the TV and the computer, the audio output is not reconfigured and remains set to the speakers. As a result, the image will be broadcast on the screen, but there will be no sound on the TV.
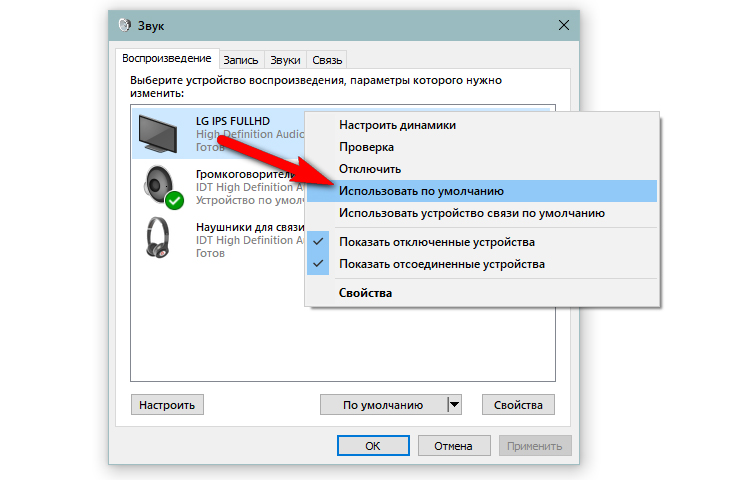
To enable HDMI audio output, you will have to manually select the output device in the system settings.
Below are the detailed steps:
- Open Windows Settings with Win + I keyboard shortcut
- Open the "System" section
- Select the "Sound" tab
- In the "Select a location for audio playback" list, select the audio output of your TV.
If the problem is not solved with the correct settings, your system may have some kind of sound problem.
There are a few simple methods to fix such problems, we will look at them below.
Simultaneous connection of two TVs
Typically, external devices only have one HDMI output port. But you can connect the device to multiple TV screens at once using a dedicated HDMI splitter/amplifier, sold separately, that will display the same content on multiple screens.
To set up a multi-screen configuration, you will need to purchase a splitter. Usually there are models like 1x2, 1x4, 1x6 or 1x8.
In other words, you connect one end of the HDMI cable to your gadget and the other end to the splitter's input port. You then connect as many additional HDMI cables as needed or available from this unit to different TVs.
After connecting, the gadget will broadcast sound and image to all connected TVs.
Why is there no sound after connecting
If the TV is compatible with the Audio Return Channel function, make sure the system is connected to an ARC-compatible HDMI IN jack on the TV.
If there is still no sound or noise, this may be due to an incorrect audio output configuration. Otherwise, it could also be a more global son-related issue on your Windows 10 PC.
If the TV is not compatible with the Audio Return Channel function, the sound from the TV will not be output from the system even if the system is connected to the TV's HDMI IN jack.
Troubleshooter
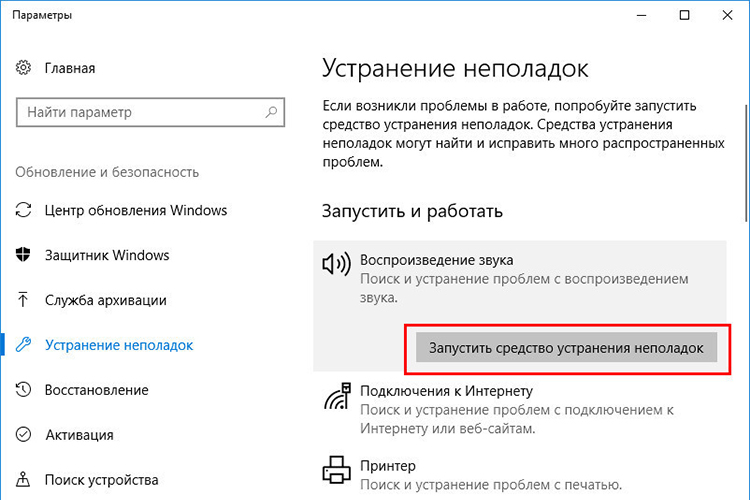
As a first step, you can use the troubleshooter, which will automatically scan your computer for possible errors:
- Enter Windows 10 settings by clicking the gear in the start menu.
- Open the "System" section.
- Go to the "Troubleshooting" tab.
- Select "Other Troubleshooting Tools".
- Open the Play Sound feature.
- Click on the "Start" button.
Driver issues
Most often, sound problems are related to updating sound output drivers.
We will look at how to update drivers using Device Manager:
- Enter Device Manager by right-clicking the Start menu and selecting it from the context menu.
- Find the heading "Audio inputs and outputs" in the list.
- Double-click the desired audio output option.
- In the window that opens, go to the "Driver" tab.
- Finally, click the "Update Driver" button,
- And select "Search for Drivers Automatically".
Connection problem
The cable connection may be loose or incorrect, which will also result in no signal output.
Check the position of the connecting cable at both ends and, if necessary, terminate the HDMI connection by disconnecting both devices and the cables connected between them.
You can do this in the following way:
- Disconnect the HDMI cables from both sides and reconnect them to the connector.
- Reconnect the original device to a power source.
- After the TV and source device have booted up, turn on the external device and wait until the signal starts coming in.
These steps, despite their simplicity, can solve a variety of problems.
For example, if the TV and the source device contain erroneous information received via the HDMI cable, a reset will reset it to zero and boot again with the correct data.
Wrong settings
If the device is connected via HDMI, find the appropriate audio settings in the settings menu of the connected device (eg digital set-top box, sound bar or Blu-ray player).
Many (Audio Return Channel) or CEC (Consumer Electronics Control) are technologies that allow devices connected via HDMI to communicate. However, due to the fact that there are different brands and models of HDMI devices, sometimes devices may not interact as expected; try turning them on.
Also make sure the system volume is not turned down.Use the volume knob to gradually increase the volume level.
If you have multiple external audio sources working at once, make sure the system is using the exact hardware you need.
To do this, for additional confidence, you can disable all connected external devices in the Device Manager, except for the one you need.
After that, restart the device and try to pair it with the TV again.
Check out other connection methods
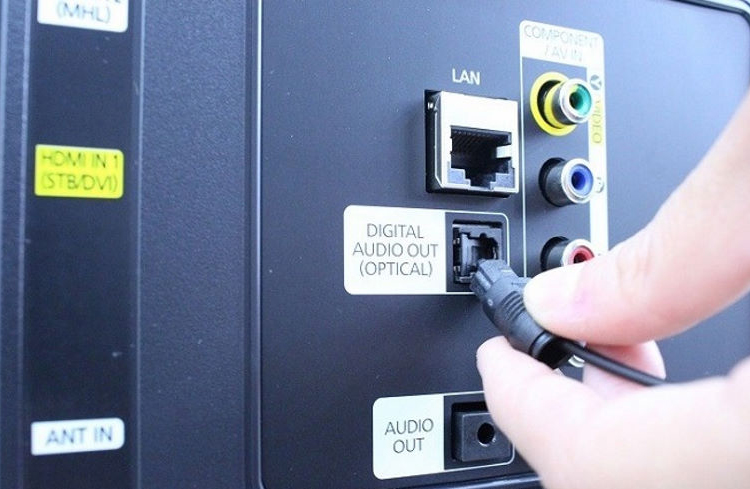
To understand the nature of the problem - whether it is technical or systemic, try replacing the HDMI cable, for example, with an optical one and check if there is a signal in this case.
Due to compatibility issues between CEC and ARC across manufacturers and models, HDMI audio may not work or intermittently drop out.
Disconnect the HDMI cable from the external device and the TV, and then connect the optical cable instead. But be aware that since optical cables do not have HDMI-CEC commands to control devices, you will need to use a pre-configured remote control.
Install device updates
The problem may also be that the product you are using as an external signal source needs to be updated.
This can apply to both a computer, smartphone or tablet, as well as a soundbar, set-top box or speaker. Perhaps installing a new firmware or update package on the device will solve some system problems that prevent normal audio signal transmission through the HDMI interface.
If necessary, reset the system to factory defaults and restart the installation process.
Why is there no sound after software update
Have you updated the software of the external device, but still no sound? There is no need to panic, it is likely that the problem has already been fixed, and the reason for the lack of sound is simply reset settings.
In such a situation, simply go back to the system settings and select the audio output of your TV, and repeat the steps that were indicated in this article.
If the device, after the above manipulations, not only does not output sound, but also does not broadcast the image on the TV screen, then most likely the problem is technical in nature and one of your devices may require a service inspection.
Useful video
How to output sound from a computer to a TV via an HDMI cable will be discussed in the video: