

How to use a blender: what it is for and what you can cook with it + video with simple recipes
 A blender is a multifunctional device that allows you to cut, mix and whip foods.
At the same time, the full set of its capabilities varies significantly depending on the type of device.
Consider why this device is needed and who invented it, what types of it exist and what it does, as well as what dishes can be cooked using this device.
Content
What is a blender and who invented it?
The word blender comes from the English blender - to mix. This unit is one of the oldest units for the kitchen. Older than him is only a meat grinder (25 years).
The first such device was invented by Stephen Poplawski in 1922. The idea of this device came to him in an attempt to automate the preparation of the drink "soda fountain". In the USSR, such a drink was known as "soda with syrup", which was sold everywhere in special vending machines.
The first of these units was a container on a stand. At the bottom of the bowl was a propeller-like knife that could only mix ingredients, but not cut. In fact, it was the first prototype of a stationary blender.
A modern blender can easily replace a food processor. Its main advantage is that it is quite small and easy to handle, which allows it to be used without any extra effort. With the help of this unit, you can easily chop, chop and whip the ingredients for dishes.
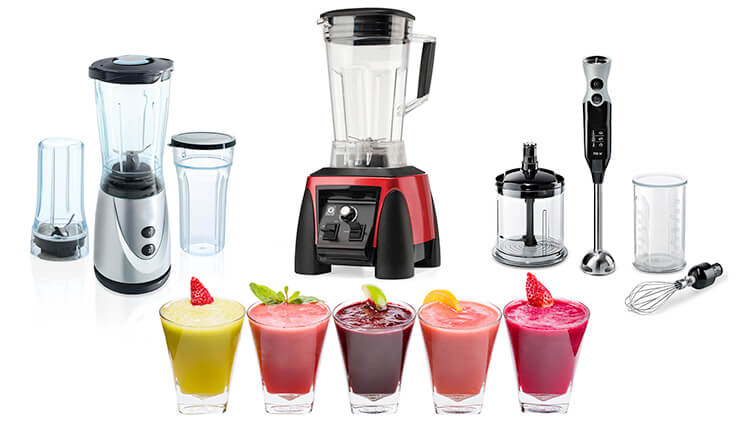
Types of devices and their differences
Existing types of blenders:
- submersible;
- stationary.
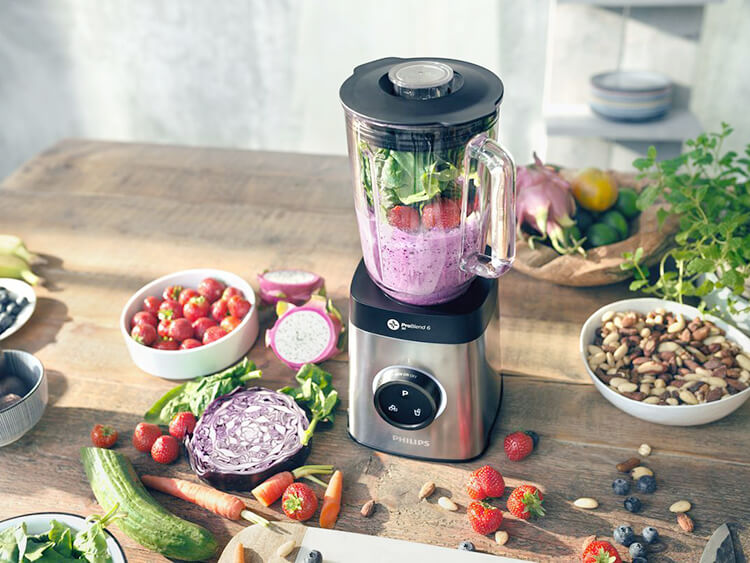
A stationary blender is a device that consists of a technical block and a mixing glass with knives at the bottom.
The advantage of this type of device is that, unlike a submersible blender, you do not need to constantly hold the device in your hands to grind food.
The disadvantage of a stationary blender is that you can only mix the ingredients in the attached bowl. But it is great for making various cocktails and smoothies.
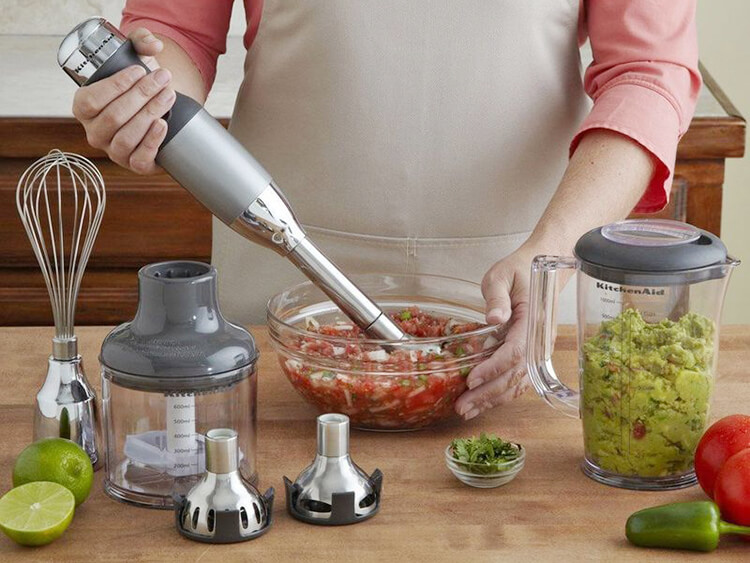
An immersion blender differs from a stationary blender in wider functionality. The device consists of two parts of a hardware unit and a nozzle, while the number and functionality of nozzles may be different.
Pros of an immersion blender:
- You can grind food in any utensils resistant to mechanical stress, which allows you to work with any amount of ingredients
- A large number of attachments that expand functionality (whisk, chopper, etc.)
- It doesn't take up much space in the kitchen.
Flaws:
- You must keep the device in your hands at all times.
- Not suitable for cooking liquid foods
Blender bowls and containers can be made of plastic, glass and metal. At the same time, glass, with careful handling, is the most durable and environmentally friendly. Nozzles are made of stainless steel or plastic.
As a result, the difference between devices in grinding products lies in different purposes. The stationary one copes better with mixing and whipping liquid consistency, and the submersible one with cutting and grinding harder products.
Useful functions of blenders
Here are the most popular blender features:
- Mixing - one of the most popular features allows you to mix and simultaneously whip liquids and suspensions until smooth. This function is the main one for stationary devices.
- Shredding and cutting - allows you to grind products to the desired consistency. In some models, the duration and intensity of slicing can be controlled manually, which allows you to achieve the optimal consistency of products for each dish from slicing to puree.
- whipping - many hand blenders have this mode thanks to the whisk attachment. Allows in some cases to replace the mixer, but in terms of power it is still inferior to it.
Additional functions and features:
- Ice cube.
- Preparation of mixtures in a vacuum environment (allows you to keep the freshness of cocktails longer).
- Speed control and turbo mode (allows you to control the speed and intensity of the device).
- Grate food directly into the cooking bowl thanks to the grater attachment.
- In expensive models, there is a dough kneading function using special “hooks” nozzles. Thanks to them, the dough is kneaded evenly and does not stick to the walls of the bowl.
What can be cooked in a blender?
With the help of a blender, you can cook a huge number of dishes:
- puree soups;
- cocktails;
- sauces;
- salads;
- various desserts.
Here are some of the most popular dishes and the general principle of making puree soups.
The principle of making puree soups using the example of mushroom cream soup
In order to cook creamy mushroom soup from champignons, you need:
- 500 grams of potatoes of any size.
- 150 grams of onion.
- 600 grams of water.
- 250 grams of mushrooms (fresh or frozen).
- 200 grams of cream 10-20% fat.
- salt (at your discretion).
At the beginning, onion is cut into small cubes and fried in refined vegetable oil for 5 minutes at medium temperature until golden brown.
Mushrooms are cut into medium pieces (you can cut a few pieces along the “mushroom shape” for decoration). Chopped champignons are added to the fried onion and fried together for 7-10 minutes to enhance the taste and aroma.
Next, a pot of water is placed on the stove and potatoes are prepared (peeled and cut into pieces the size of a walnut). After boiling, the potatoes are thrown into the water and boiled until cooked for about 15 minutes.
After that, add the onion-mushroom mixture to the pan and cook for another 5 minutes, and then grind the pieces of vegetables in the soup with a blender to a puree state.
The last step is to add cream to the prepared mixture and, stirring, bring to a boil. The dish is decorated with slices of fried mushrooms and herbs.

Curd
The recipe for curd mass is extremely simple.
To make curd mass, you need:
- about 500 grams of cottage cheese
- 4-5 large spoons of sour cream
- salt and sugar to taste
Proportions are approximate and may vary. Also, if desired, you can add various berries and jam.
An immersion blender is the best way to prepare this dish. All ingredients are loaded into the dishes and ground to a homogeneous mass for 2-3 minutes.
Milk shake
A stationary blender will do better with a milkshake.
The principle of its preparation is to whip milk and ice cream with various fillers. In this case, the ratio of ingredients can be very different depending on preferences. For example, for a classic milkshake, a glass of milk and a couple of scoops of creamy ice cream will suffice.
Of course, this is not all that can be cooked with a blender, there is hundreds of recipes using this device.

What can you grind in a blender?
In a blender, you can grind many ingredients.
The most popular of them are:
- Vegetables, fruits and berries - cucumbers, tomatoes, carrots, cabbage, eggplants, zucchini, onions, pumpkins, apples, bananas, pears, etc. Almost any berries can be chopped. It is important to mention that when making mashed potatoes with a blender, it becomes more viscous and dense due to starch and what consistency will not be to everyone's taste. You should also refrain from blending apples with metal nozzles, since when in contact with metal, the apple oxidizes and changes its taste.
- Various greens - parsley, dill, green onion.
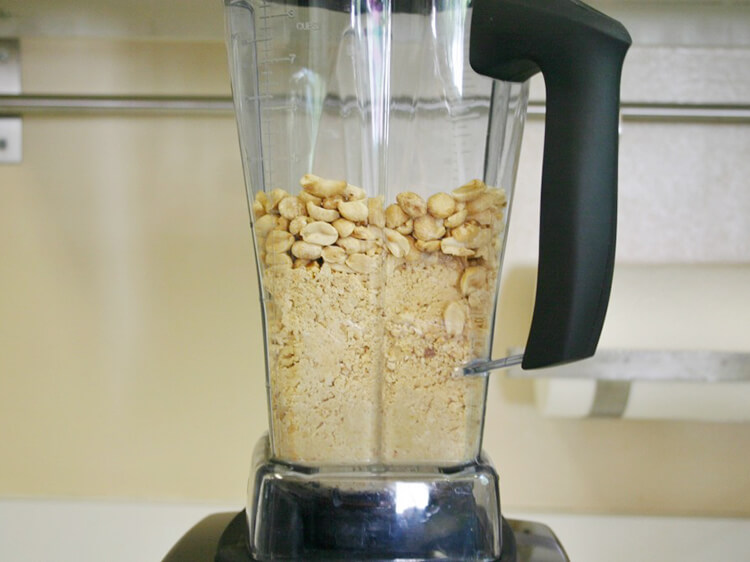
- nuts - peanuts, walnuts, cashews, almonds and others. In this case, they can be crushed to a paste state.
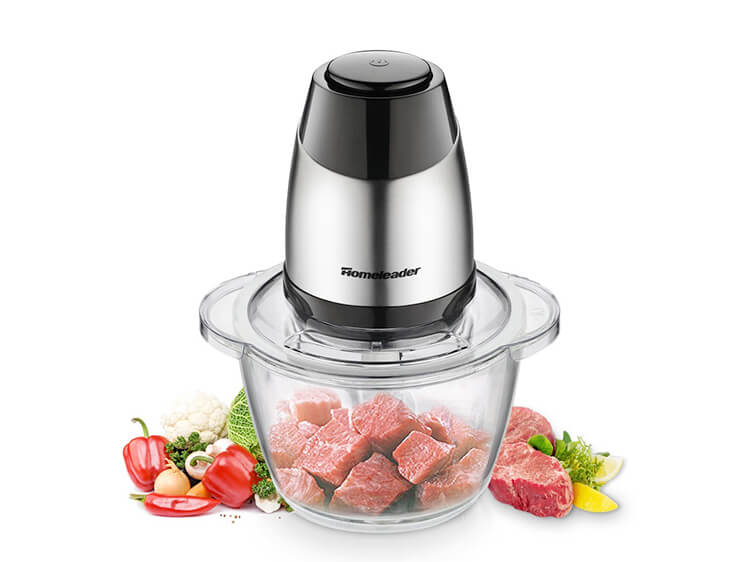
- Meat - beef, pork, veal, lamb.The resulting minced meat has a slightly different, denser texture, which makes the cooked meat more uniform, but less juicy.
- The blender can also be used as a coffee grinder - grind coffee, and break ice in the presence of a special grinder.
The most important rules of use
Basic Rules:
- Do not wash the base handles and motorized stands under running water or immerse them in any way in running water, as the liquid will damage the electronic components. To clean these parts, use a well-wrung damp cloth or a special cleaning cloth.
- If a burning smell occurs during operation, immediately turn off the device.
- Do not use a defective appliance; in case of breakdown, take it to a qualified specialist in a service center.
- It is forbidden to use the blender by children and persons who do not have the skills to safely handle the device.
- When using the blender, do not put your fingers into the container with the device running, and when washing, also be careful, as the knives are very sharp.
General step by step instructions
Instructions on how to properly use a stationary blender:
- Connect the block rack with the motor to the mains
- Put the food in the mixing bowl without exceeding the maximum mark
- Attach the filled bowl to the motor unit and be sure to cover with a lid
- Turn on the device using the required mode, following the time recommended for continuous operation (it varies for devices from different manufacturers, usually 2-3 minutes)
- At the end of mixing, pour the resulting mixture into a container, and gently wash the bowl and wipe it dry.
- Unplug the appliance after use
Immersion Blender Instructions:
- Attach the necessary attachment to the blender
- Connect the base handle with the motor to the mains
- Place food in a scratch-resistant container
- Turn on the device using the required mode, following the time recommended for continuous operation (it varies for devices from different manufacturers, usually 2-3 minutes)
- After mixing or chopping, unplug the appliance from the socket
- Detach the nozzle from the base handle for later washing
If the correct mode of operation is observed, your blender will remain an indispensable assistant in the kitchen for a long time and will last for many years.
Useful video
The video gives interesting recipes for a blender:

I like the stationary blender much more, it's more powerful and easier to use.
I have a Rawmid Classic blender. The bowl is made of tritan. This is a modern durable and environmentally friendly polyester, in terms of its characteristics it is better than glass. My blender is very powerful, it even grinds horseradish roots. We use it every day, we prepare green smoothies, fruit smoothies, sauces and mayonnaises from seeds and nuts, nut milk. Everything is very tasty and healthy.
The stationary blender must be assembled (if it is after washing), then disassemble the whole procedure. Then, if you do not have a very large volume of products? The immersion blender is more mobile, chop, rinse and you're done. I have both types, and so I use stationary 3-4 times a year.
I have a Braun immersion blender. Very satisfied. Especially for nephews to make puree soup. But for smoothies with ice is not very suitable. I plan to buy a stationary blender for this.I choose between Scarlett and Clatronic, but I will probably choose Scarlett, since I have already taken a lot of equipment from this company. The quality is good and the price is good